Create a beautiful Christmas tree icon in Photoshop
Let Artdesigner.lv take you through steps of creating a beautiful and detailed Christmas tree.


We’re going to do a real Christmas tree icon. I said “real”, because you might notice that most christmas tree icons look quite symbolic, without detailed needles on the branches, and this is understandable, because the first thing that comes to mind is “OMG I’m not going to draw every needle and branch, BORING!!”. But really, it is much more simple.
Step 1 — branches
We start by opening up a new document. The first branch looks like this. I used a small brush (3 px) with color #808250.

Needles use color #7f9451. It’s going to be fast if you have tablet, if you don’t — see step 2.

And more needles with a lighter color, #aabc8a.

Step 2
If you don’t have tablet you can use the standard Photoshop brush ‘Dune Grass’, just modify brush tip shape.

Rotate the angle according to side which you draw with brush. But be careful. Use more spacing, otherwise it’s going to be branches with fur, not branches with needles.

So, the first branch is done, but we gotta do more. We need at least 4 in different variations (rotation, shape, size) on separate layers.

Step 3
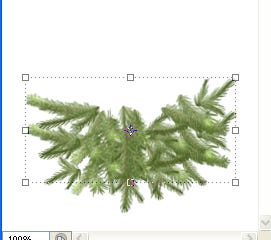
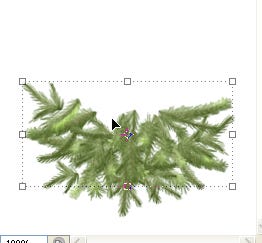
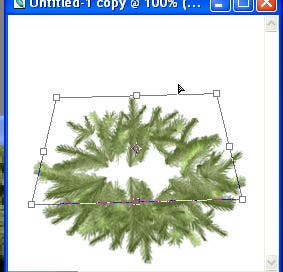
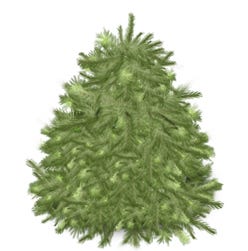
Create new document with size of icon you want to do, I used 256 pixels by 256 pixels. Start creating the bottom of the Christmas tree with the branches we already did. Duplicate,rotate and resize so they will be different. Make about 10–12 branches.

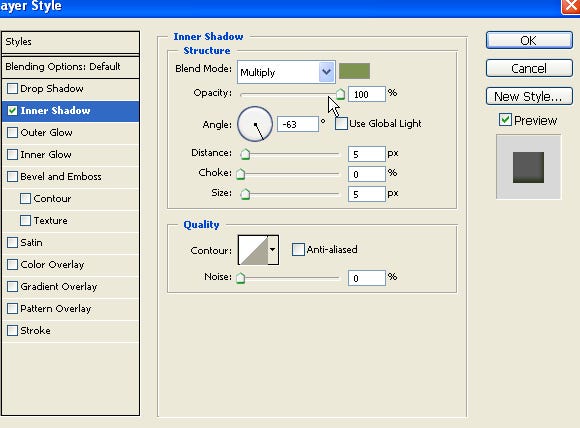
We make small inner shadow for the branch, so it won’t look so flat. Apply this style to all branches.
Step 4
Merge your branches into one layer, and duplicate it.
Flip horizontal.
And move the new layer a little above the existing branches, so it will look like solid bush.
Duplicate again and make background branches using Transform-> Distort.
Duplicate once again and make upper level.
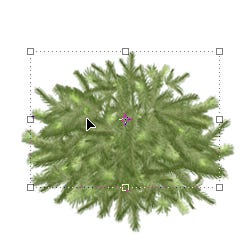
We are in the middle of the Christmas tree, so next levels won’t need as many branches. We use about half as much.

The last level of branches will need some work. For a better result, put together this level using the single branches we started out with. Just keep in mind to place them closer together.
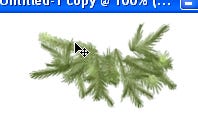
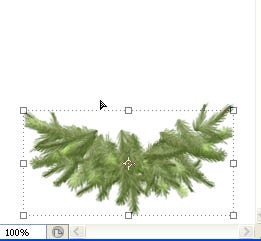
I don’t like this empty spaces in bottom so I filled them with a small size copy of the lower level of branches.

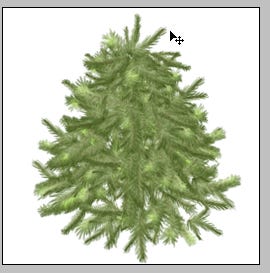
The tree looks quite shaggy, so we’ll give it a haircut with the Eraser tool.
Step 5
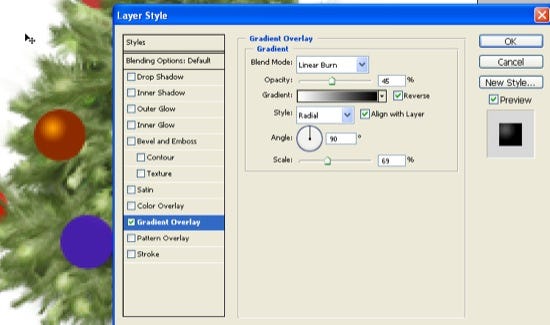
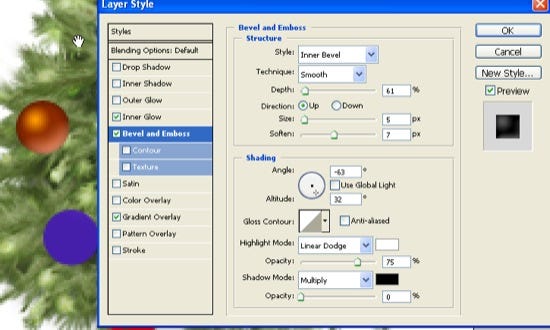
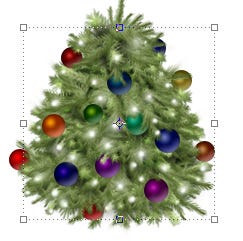
Now, that hardest part is done, we can start to decorate the Christmas tree and give it more of a 3D look. I want to do different colored balls. If you want a one-color Christmas tree, do one color round shapes between branches layers.
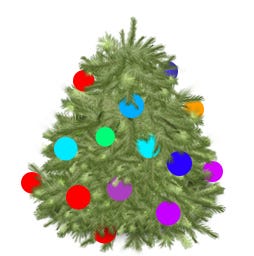
To get a 3D effect for use these options in Layer style:

This is the result of the 3D effect:

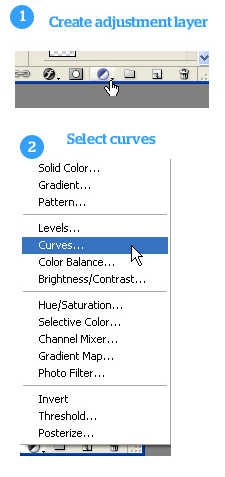
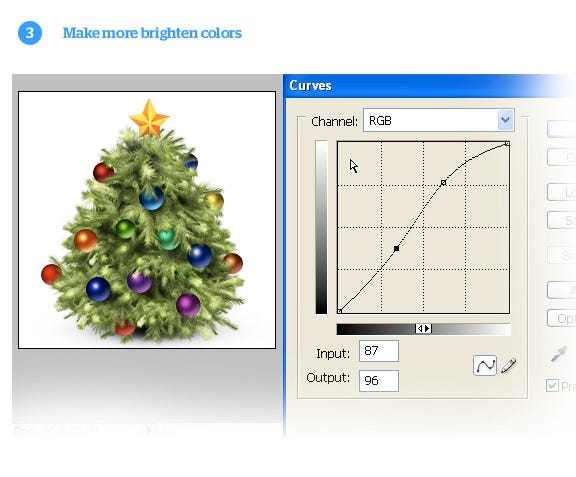
Step 6
The Christmas tree still looks quite flat, so what we’re going to do is make dark shadows with a big soft brush in new layer between the branch layers. Blending mode for all shadow layers must be “Multiply” mode and not full opacity.
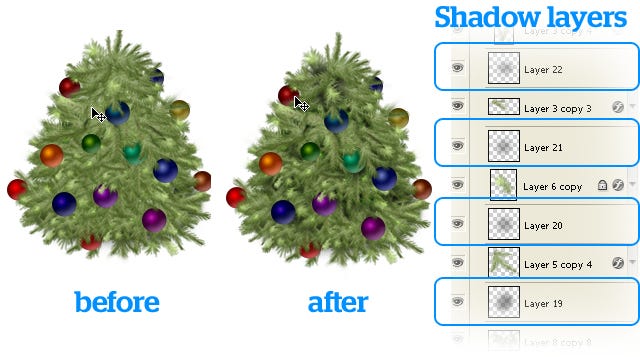
Create a new layer and do some white spots with white 9–13 pixel brush. This is to add some contrast. We’ve already created the dark part, now it’s time for light.
Set blending mode to “overlay” for this layer and ~48% opacity. And you should have something like this:
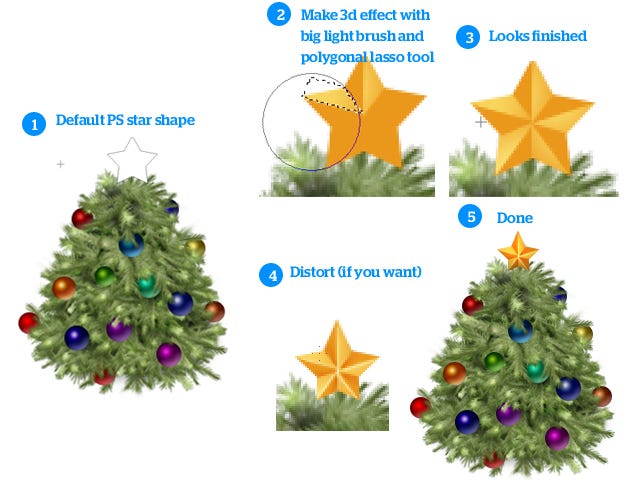
Now you can make a star or any other decorations for the Christmas tree. Below is a quick tutorial for star:
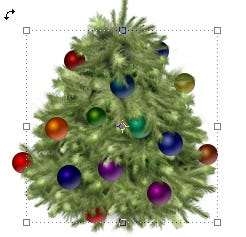
Step 7 — add a little shadow
Create a new layer and send it to the back. Draw a little with a big black soft brush, scale it to fit and the move it under the Christmas tree.
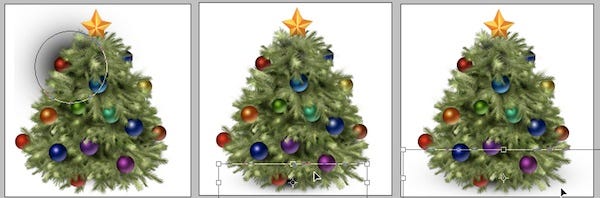
Now we will make more contrast
Ta-daa!!
After you save for web what you’ve done, you can open PNG and add some sharpness so it will look more detailed.

This tutorial was written by Artdesigner.lv for IconFinder. Please visit Artdesigner.lv for more information orbrowse through their Christmas icons on IconFinder.

